
When it comes to getting that flawless tiled finish in your kitchen, bathroom, or even outdoor space, using the right Tile Adhesive is just as important as selecting the perfect tiles. No matter how premium your tiles are, without proper installation using the correct adhesive, you may face loose tiles, cracks, or uneven surfaces over time.
In this guide, we’ll take you step-by-step through the tile adhesive application process to help you achieve perfect tile installation like a pro!
What is Tile Adhesive?
Why Use Tile Adhesive Instead of Cement Mortar?
Traditional methods using cement and sand are outdated and inconsistent. Tile Adhesive provides:
- Stronger bonding strength
- Easy and fast application
- Uniform thickness
- Less shrinkage or cracking
- Ideal for vertical and horizontal surfaces
- Compatibility with modern tile types (e.g., vitrified, porcelain)
Types of Tile Adhesives and Their Uses
Choosing the correct Tile Adhesive depends on your tile type, location (indoor/outdoor), and substrate (surface).
Here are common types:
Step-by-Step Guide to Using Tile Adhesive
Now, let’s dive into the process of achieving a perfect tile installation using Tile Adhesive:
Step 1: Surface Preparation
• Ensure the surface is clean, level, and dry.
• Remove any dust, oil, or loose particles.
• If the surface is uneven, use a leveling compound before applying adhesive.
• Wet the surface slightly if required (for cement-based substrates).
Tip: Never apply tile adhesive on freshly plastered or painted surfaces without proper curing.
Step 2: Choosing the Right Tile Adhesive•
• For ceramic tiles: standard cement-based adhesive works
• For large-format tiles or stone: use a high-bond adhesive.
• For glass mosaic or vitrified tiles: go for flexible or polymer-modified adhesives.
Tip: Always check the manufacturer’s recommendation on the adhesive packaging.
Step 3: Mixing the Tile Adhesive
• Use a clean bucket to mix powder-based tile adhesive with water (as per ratio mentioned on the package).
• Mix thoroughly using a mechanical stirrer or drill mixer until it forms a lump-free, uniform paste.
• Allow the mix to stand for 5-10 minutes (maturation) before use.
Note: Only mix as much as you can use within 30–40 minutes to avoid wastage.
Step 4: Applying the Adhesive
• Use a notched trowel to spread the adhesive on the surface.
• Hold the trowel at a 45–60° angle for an even, ridged spread.
• Apply only small sections at a time (about 1 sq. meter) to prevent drying before tile placement.
Pro Tip: Apply adhesive to both tile and surface (dual bonding) for large tiles or exterior installations.
Step 5: Placing the Tiles
• Gently press the tile into the adhesive bed using slight twisting motions.
• Maintain uniform gaps between tiles using tile spacers for grout lines.
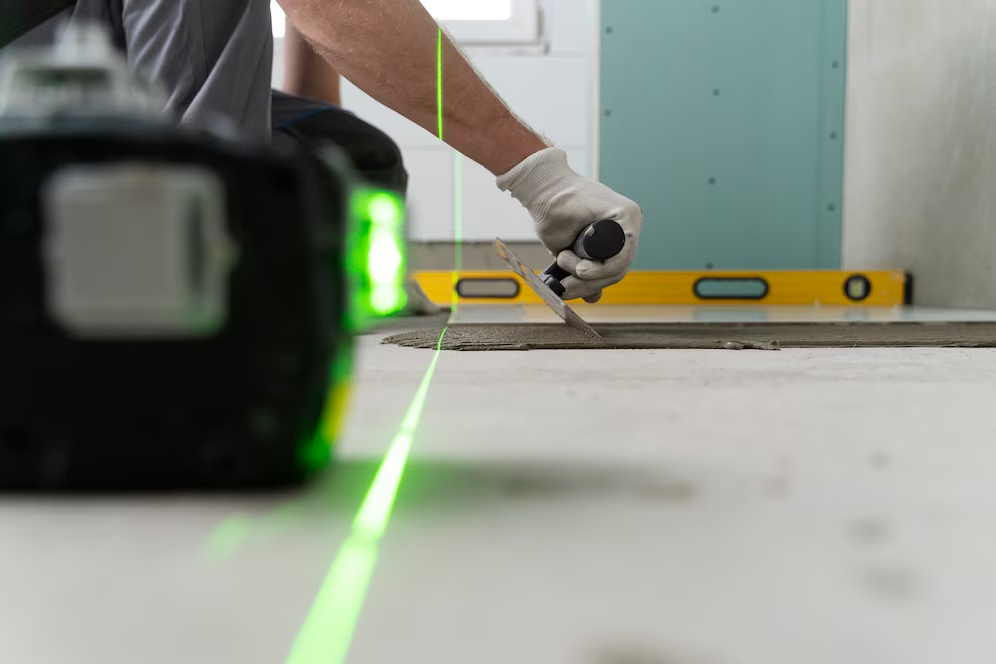
• Check tile levels with a spirit level to ensure an even finish.
Do not hammer the tiles—use a rubber mallet for light tapping if needed.
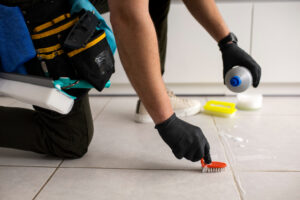
Step 6: Cleaning Excess Adhesive
• Immediately wipe off any excess Tile Adhesive that oozes out from tile joints using a damp sponge or cloth.
• Do not let the adhesive harden on tile surfaces—it becomes difficult to clean.
Step 7: Curing and Drying Time
• Allow the adhesive to cure for at least 24 hours before grouting or walking on the tiles.
• For epoxy-based adhesives, curing time may vary based on temperature and humidity.
Common Mistakes to Avoid
• Applying adhesive on dusty or damp surfaces
• Using expired or improperly mixed adhesive
• Skipping spacers or grouting too early
• Spreading too much adhesive at once
• Not using proper adhesive type for your tile or surface
Avoiding these mistakes ensures your tiles stay put and look stunning for years.
Tools You’ll Need
- Notched Trowel
- Rubber Mallet
- Mixing Bucket
- Mechanical Mixer
- Tile Spacers
- Leveling Tools (Spirit Level, Laser Level)
Bonus Tips for a Professional Finish
- Always read and follow the instructions on your Tile Adhesive pack.
- Use a laser level for perfect tile alignment.
- Don’t walk on freshly tiled areas until the adhesive is completely cured.
- Consider using epoxy grout for wet areas for a waterproof seal.
Maintenance After Installation
Even after a perfect installation, proper tile care is essential. Use mild cleaners, avoid acidic chemicals, and seal the grout regularly to maintain a polished look.
Final Thoughts
Using the right Tile Adhesive the right way is the secret to a long-lasting, professional-quality tile installation. Whether you’re doing it yourself or hiring a contractor, understanding the process empowers you to make smart choices.
From surface prep to adhesive selection and tile placement, every step counts. So, invest in good quality tile adhesive and tile accessories, take your time, and don’t cut corners—your beautiful tiled floor or wall will thank you later!
Need expert-grade Tile Adhesive?
Choose trusted brands that ensure high bonding strength and durability. Always buy from authorized suppliers and follow installation guidelines for the best results.